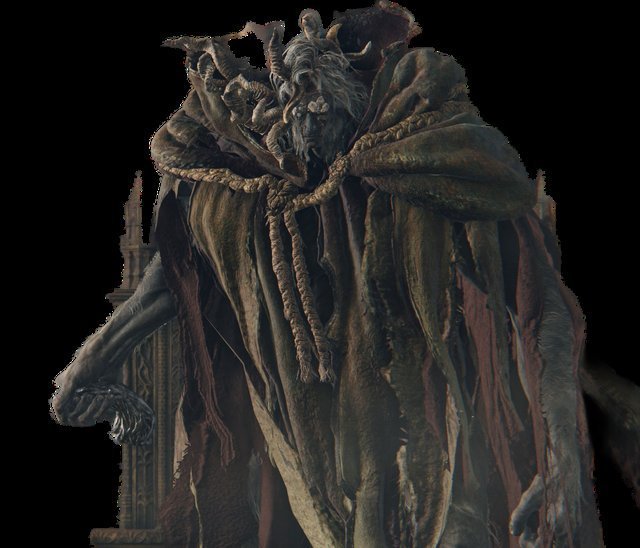
Phase 1 Strategy — Cursed Sword Combos
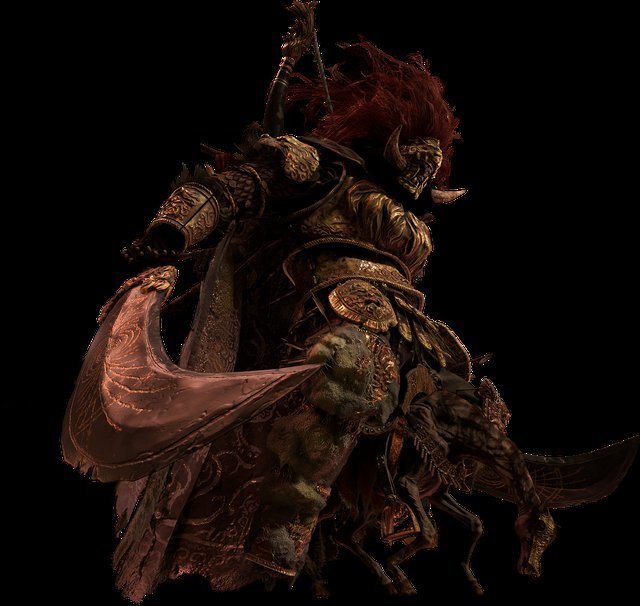
Morgott's phase 1 moveset is similar to his earlier incarnation, Margit, but significantly faster with extended combo strings. His cursed sword attacks have delayed timings designed to catch panic rollers. Roll toward his left side (your right) to avoid most horizontal swings. His tail sweep has a long wind-up — jump over it for a guaranteed counter-attack. The golden hammer summon slams down vertically with a telltale golden glow; roll sideways when you see the light. Fextralife's Morgott page has frame-by-frame breakdowns of every combo pattern.
Phase 2 — Holy Spear Rain and Golden AOE
At 50% HP, Morgott gains several new attacks including the devastating holy spear rain where he summons golden spears from the sky that track your position. Sprint in a wide arc to avoid the barrage. He also acquires a golden AOE explosion around his body and extends his combo chains with additional hammer and dagger summons. The key to phase 2 is staying close to him — his ranged holy attacks are harder to dodge than his melee combos, which have familiar timings from phase 1. Wikipedia's Elden Ring article provides background on Morgott's role as the hidden ruler of Leyndell.
Morgott's Shackle and Positioning
Margit's Shackle (found in Murkwater Cave) also works on Morgott — it's the same item, revealing that Margit and Morgott are the same person. The shackle can be used twice in phase 1, each use stunning Morgott for 3 seconds. Save the second use for when Morgott becomes aggressive to create a safe healing window. In phase 2, the shackle no longer works. Positioning-wise, stay in the center of the arena to avoid getting cornered. The arena pillars can be used to block his hammer throw but will be destroyed by his golden AOE attacks in phase 2.
Best Equipment and Stats
Recommended level 80-100 with a +18 to +22 weapon. Morgott deals primarily physical and holy damage. The Dragoncrest Shield Talisman +2 significantly reduces his physical damage output. For holy defense, the Haligdrake Talisman is effective. He is weak to slash damage — katanas, curved swords, and bleed weapons perform well. Scarlet Rot works but has limited duration windows. Strike damage and holy damage are less effective. Equip the Radagon's Scarseal for extra stats at early levels, and consider the Green Turtle Talisman for stamina recovery during extended combos.
Punish Windows and Aggression
Morgott has a unique stamina system — after extended combos, he will stagger briefly. This is your punish window. The most reliable punish opportunity is after his 4-hit sword combo: roll through all hits, and you have 1.5 seconds for 2 light attacks or a charged heavy. His dagger throw leaves him open for a jumping attack. Beware of his two-stage combos — sometimes he pauses mid-combo to bait a roll before continuing with a delayed hit. Learn to recognize his fake-out body language: if he holds his sword above his head, expect a delayed slam rather than a quick thrust.
Rewards and Lore Significance
Defeating Morgott rewards 120,000 runes and the Remembrance of the Omen King. Exchange it for Morgott's Cursed Sword or the Regal Omen Bairn. More importantly, Morgott's defeat is the key story requirement for accessing the Mountaintops of the Giants — Melina will give you the Rold Medallion after the fight. Lore-wise, Morgott is the true ruler of Leyndell, loyal to the Erdtree despite being persecuted as an Omen. His title "Last of All Kings" reflects his tragic role as the final defender of an order that rejected him. His death speech reveals his deep love for the Erdtree and his desire for approval he never received.
Location and Access to the Royal Capital
Morgott, the Omen King, sits at the foot of the Erdtree in Leyndell, the Royal Capital. Accessing Leyndell requires defeating two Shardbearers (Godrick and Rennala are the most common choices) and then ascending through the Grand Lift of Dectus using both halves of the Dectus Medallion. An alternative route involves passing through the Ruin-Strewn Precipice, a hidden cave system east of Liurnia that bypasses the Grand Lift entirely. Once inside Leyndell, navigate through the capital's golden streets, past the Avenue Balcony grace, through the Erdtree Sanctuary, and finally to the Queensbedchamber — though the path is blocked by the Golden Godfrey shade initially. The Erdtree Sanctuary grace is the closest rest point to Morgott, requiring only a short run across a rampart and through a door guarded by a single Leyndell Knight.
Leyndell is the most densely packed Legacy Dungeon in Elden Ring, filled with hidden paths, optional bosses, and valuable loot. Before challenging Morgott, explore the capital thoroughly for the Erdtree's Favor, the Golden Vow incantation, and the Bolt of Gransax. The optional Crucible Knight Ordovis boss in the Auriza Hero's Grave drops the Ordovis's Greatsword. The Subterranean Shunning-Grounds beneath Leyndell contains the Cathedral of the Forsaken with the Frenzied Flame ending progression. After Morgott's defeat, the Erdtree remains sealed and you must journey to the Mountaintops of the Giants via the Rold Medallion, which Melina gives you after the fight. Lock yourself out of any unfinished Leyndell side quests before progressing beyond Morgott.
Margit Versus Morgott — Understanding the Connection
Margit the Fell Omen and Morgott the Omen King are the same person. Margit is an alias that Morgott uses to test Tarnished before they reach the capital, serving as a gatekeeper who protects the Erdtree from beneath. When you defeat Margit at Stormveil's gate, you are fighting Morgott projecting his power through spectral magic — the real Morgott remains in Leyndell. This explains why Shackle of Margit works on both bosses: it affects the same individual. Margit's moveset is a simplified version of Morgott's, with fewer combo extensions and no phase 2 holy spear attacks. The Margit fight teaches you the fundamental patterns that Morgott uses in more complex sequences. Players who mastered Margit at level 20-30 will find Morgott's faster combos more intuitive than those who skipped Stormveil.
The lore significance of Margit's alias is deeply tied to Morgott's self-loathing. Morgott, cursed as an Omen, hides his identity behind the Margit persona — "Margit" being an anagram or derivative designed to conceal his royal heritage. Throughout the first half of the game, Morgott works tirelessly to stop Tarnished from reaching the Erdtree, believing that the Golden Order must be preserved at all costs. When you finally face him as Morgott in Leyndell, he reveals his true identity and laments that the Erdtree has rejected even him, its most loyal defender. His death speech — "The Erdtree... shrouds itself... from even me..." — is one of the most poignant moments in Elden Ring, as the being who dedicated his entire existence to protecting the Erdtree realizes it never valued his loyalty.
Phase 2 Holy Attack Survival Guide
Morgott's phase 2 holy spear rain is the most dangerous added attack, capable of one-shotting players at 35 Vigor or below. When Morgott raises his scepter and golden light coalesces above him, sprint immediately — do not roll. The spears track your position but have a fixed landing delay, so constant movement prevents them from hitting. The rain falls in three waves with approximately 1 second between each wave. Use the arena's pillars as cover; the spears cannot penetrate the stone architecture. If caught in an open area, equipping the Haligdrake Talisman +2 reduces holy damage by 20%, making the spears survivable. The spear rain ends with a single large golden spear that Morgott throws manually — this one tracks more aggressively and requires a well-timed roll at the last moment.
Morgott's golden AOE explosion, where he slams his scepter into the ground and creates a expanding golden ring, requires jumping to avoid. Unlike his melee swings, the AOE ring's hitbox is at ground level, and jumping completely negates it. The timing is forgiving: jump when you see the ring reach its maximum expansion and begin contracting. After the explosion, Morgott is briefly exposed, providing a 3-second punish window. His phase 2 also adds a golden hammer summon that Morgott can swing simultaneously with his cursed sword, creating a dual-wield combo that covers both horizontal and vertical angles. The solution is to roll diagonally toward Morgott's right side, avoiding both weapons simultaneously. Practice phase 2 attacks by using the Mottled Necklace +2 for status resistance and the Spelldrake Talisman for magic damage reduction, as the golden weapons deal holy damage.
Morgott's AI behavior changes in phase 2 to become more aggressive when the player attempts to heal. Unlike phase 1 where he gives brief breathing room, phase 2 Morgott will immediately punish flask usage with a charging thrust or a thrown golden spear. The safest healing windows are after dodging his 5-hit combo (he recovers for 2 seconds) or immediately after his golden AOE explosion dissipates. Using the Crimson Crystal Tear in your Physick Flask provides a burst heal that can be consumed preemptively, reducing the need for mid-combat flask usage. The Crimsonburst Crystal Tear provides passive HP regeneration over 3 minutes, allowing gradual recovery without exposing yourself to attack. For faith builds, the Great Heal incantation heals more per cast than a Crimson Flask but requires a longer casting animation — use it only behind pillar cover or immediately after a stance break. The Erdtree Heal incantation creates a massive AOE healing burst that can also stagger nearby enemies, providing a brief safety window.