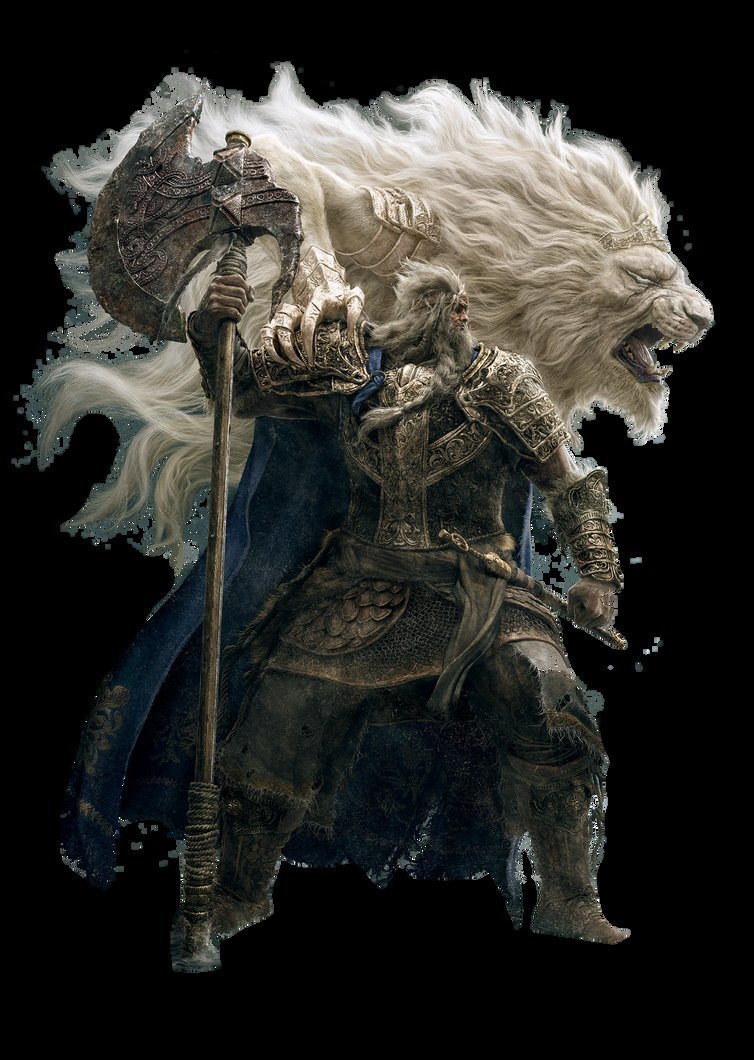
Phase 1 Strategy — First Elden Lord
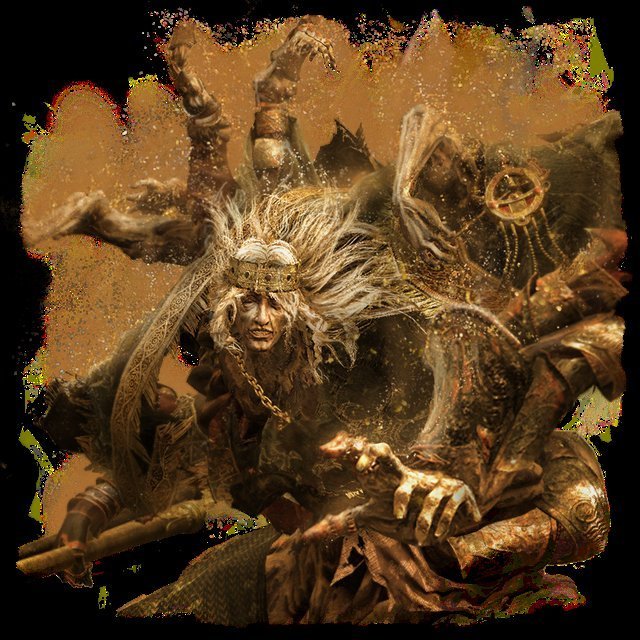
Godfrey begins as a calculated warrior wielding his massive battle axe. He opens most combos with a horizontal sweep followed by a delayed overhead slam. The key to phase 1 is recognizing the tell for his earth-shaker stomp — he lifts one foot high and holds it before slamming down with a shockwave. Sprint away when you see the foot lift. After his standard 3-hit combo (axe swing, backhand sweep, overhead slam), there is a consistent punish window of about 1.5 seconds. Fextralife's Godfrey page has detailed frame data for each attack.
Phase 2 — Hoarah Loux, Warrior
Godfrey sheds his Serosh persona and fights as the wild warrior Hoarah Loux. His phase 2 arsenal includes devastating grab attacks, leaping body slams, and the dreaded earth-shaker AOE. The grab attacks have distinct tells — when he roars and spreads both arms, he will attempt a double hand slam that can be jumped over. The lunging grab should be rolled sideways, never backward. His earth-shaker AOE requires precise timing: roll into him on the third pulse. Wikipedia's Elden Ring article provides an excellent overview of the game's endgame bosses.
Best Equipment and Stats
Recommended level 120-150 with a +25 weapon. Lightning-infused weapons deal bonus damage as Godfrey has no innate lightning resistance. The Dragoncrest Greatshield Talisman is essential for mitigating his physical AOE damage. Equip the Claw Talisman if you plan to use jump attacks aggressively. For armor, prioritize poise above 51 to avoid being staggered by his lighter attacks. The Crucible Tree Set offers excellent poise-to-weight ratio. Magic damage is moderately effective, but bleed and frost buildup work well if you can maintain pressure.
Spirit Ashes and Summons
Godfrey is one of the few endgame bosses where spirit ashes remain highly effective. Mimic Tear +10 draws aggro reliably through both phases. Black Knife Tiche's ranged attacks and life-draining abilities keep her alive longer than most summons. If you prefer NPC summons, Nepheli Loux's sign is available outside the fog wall — fitting given her connection to Godfrey. Summons are particularly valuable in phase 2 where Hoarah Loux's grab attacks can one-shot you; a summon absorbing even one grab creates a massive opening for charged attacks.
Common Mistakes and How to Avoid Them
The most common mistake against Godfrey is panic rolling through his delayed attacks. His axe combos have intentional pauses designed to catch early rolls. Wait for the swing animation to begin before pressing dodge. Another frequent error is attempting to heal from mid-range — Godfrey closes distance instantly with his leaping slam. Only heal when you are behind cover of a pillar or immediately after dodging a combo. In phase 2, do not attempt to trade hits with Hoarah Loux; his hyper armor on grab attacks will out-trade almost any weapon.
Rewards and Remembrance
Defeating Godfrey rewards you with 300,000 runes and the Remembrance of Godfrey. This remembrance can be consumed for 30,000 runes or exchanged with Enia at the Roundtable Hold for either the Axe of Godfrey (a colossal axe with earth-shaker weapon art) or the Hoarah Loux's Earthshaker (a powerful AOE incantation). The Axe of Godfrey is particularly strong for strength builds, scaling primarily with strength and requiring 42 strength to wield effectively. It pairs well with the Lion's Claw ash of war for extended stagger pressure against large bosses.
Location and Prerequisites
Godfrey awaits you at the throneroom of Leyndell, the Royal Capital, accessible after defeating Maliketh in Crumbling Farum Azula. The Queensbedchamber grace site is directly outside the boss arena, providing the shortest run-back of any endgame boss. To reach Godfrey, you must first defeat the Golden Godfrey projection beneath the Erdtree Sanctuary — this phantom version has a reduced moveset without phase 2 and rewards weaker runes. The real Godfrey appears only after Maliketh is defeated and the throneroom transforms into the arena for the final two bosses. This means Godfrey serves as the penultimate boss of the entire game, with only Radagon and the Elden Beast remaining afterward. The recommended level for Godfrey is 130-150 with a fully maxed weapon at +25 or +10 Somber, as he represents the final test before the game ending.
Before entering Godfrey's arena, ensure you have completed any remaining Leyndell side quests, as the Capitol transforms after Maliketh's defeat. The throneroom itself is the same location where you fought the Golden Shade earlier, now fully reconstructed and unsealed. Godfrey's phase 1 is fought on a flat stone floor with no environmental hazards, but the pillars around the arena can be used to LoS his earth-shatter shockwaves. Phase 2 adds no new environmental elements beyond the golden dust kicked up by Godfrey's AOE attacks. The boss music is one of the most celebrated tracks in the game — it transitions from a regal, measured theme in phase 1 to chaotic war drums in phase 2, mirroring Godfrey's transformation from king to warrior.
Serosh and Godfrey's Lore
Serosh, the beast regent on Godfrey's back, is more than a cosmetic detail — he represents the suppression of Godfrey's warrior nature so he could rule as a civilized Elden Lord. Serosh is described as "the Lord of Beasts" who was "made to suppress the ferocious warrior's bloodlust." Throughout Godfrey's rule, Serosh served as both advisor and limiter, keeping the Hoarah Loux persona restrained so that a king could govern the Lands Between. When Godfrey sheds Serosh at the start of phase 2, he is not simply removing armor — he is killing his own restraint, rejecting the crown and returning to his true nature as a wild warrior. This moment is one of the most powerful cutscenes in Elden Ring, with Godfrey tenderly thanking Serosh before tearing him off, showing respect even as he discards civilization itself.
Godfrey was the first Elden Lord, husband to Queen Marika, and father to Godwyn the Golden and the Omen twins Morgott and Mohg. He was also the leader of the Tarnished — when Marika removed grace from Godfrey's army after the wars of conquest, she sent them from the Lands Between, promising they would return when the Elden Ring was shattered. This makes Godfrey essentially the spiritual father of the player character, as all Tarnished trace their lineage back to his army. His title "Hoarah Loux" suggests a pre-Erdtree name, possibly from a warrior culture that existed before Marika's ascension. The connection to Nepheli Loux, a potential successor to Godrick's throne, suggests Godfrey's bloodline continues through the Tarnished. When Godfrey says "I have given thee courtesy enough" before phase 2, he is acknowledging that the Tarnished has proven worthy of facing him at full strength.
Phase 2 Grab Attacks — Complete Reference
Hoarah Loux's phase 2 grab attacks are among the most dangerous moves in Elden Ring, capable of one-shotting players at 40 Vigor or below. The first grab type is the double-hand slam: he roars, spreads both arms wide, and slams them together in front of him. This attack has a deceivingly slow wind-up that tempts early rolls. Jump over the slam rather than rolling — the hitbox is horizontal and jumping completely avoids it while positioning you for a counter-attack. The second grab is the lunging tackle: Hoarah Loux crouches briefly before lunging forward with both arms outstretched. Roll sideways at the last moment, never backward, as the forward range is longer than expected. The third grab animation sees him stomp one foot and sweep a wide arc with his arm; this is a mix-up that punishes players who default to rolling behind him.
Counter-strategies for his grabs include using the Endure ash of war to hyper-armor through the damage while maintaining position, or the Vow of the Indomitable to completely negate grab frames. The Raptor of the Mists ash of war evades grab hitboxes entirely and allows an immediate jumping counter-attack. For shield users, the Fingerprint Stone Shield with 87 guard boost can block grab attacks with minimal stamina damage, though you will still take chip damage. The Crimsonwhorl Bubbletear in your Physick converts all grab damage to HP for 15 seconds, allowing you to survive even mistimed dodges. Practice phase 2 by entering the arena with the sole objective of dodging — do not attack, just learn the grab tells. Once you can consistently dodge all three grab types for 2 minutes, the phase 2 fight becomes dramatically easier.
The arena environment offers additional tactical options for phase 2. The pillars at the edges of the throneroom can block some of Hoarah Loux's AOE shockwaves, though they break after two hits. Leading him near a pillar before the grab attack gives you extra cover if the dodge timing fails. The arena floor in phase 2 develops cracks and golden fissures as the fight progresses, indicating areas affected by his earth-shattering attacks. Stay in the center of the arena for maximum dodging space — cornering yourself against a broken pillar reduces escape options. The boss music in phase 2 crescendos during his grab attacks, giving an audio cue you can learn to associate with the dodge timing. Experienced players recommend fighting Godfrey without lock-on in phase 2, as the camera can become disorienting during his lunging grabs. The unlocked camera gives better spatial awareness of both his body language and the arena boundaries.